Corporate videos are a reflection of your brand’s identity, values and professionalism. Color grading is one tool which can help in complementing your message with the visuals. It helps shape perception, evoke emotion and elevate brand identity.
The right color tone can subtly influence how the audience feels and engages with your video content. Creating a visual mood that aligns with the message, reinforces the brand palette and subtly influences the viewer’s emotional response is essential to make it memorable for the viewers.
There are certain techniques of color grading which you can use to enhance the quality, look and feel of your videos. Read to discover the techniques below.
The 10 Color Grading Techniques
Before we dive into the techniques, let’s brush up on the basics first by looking at the definitions.
Color grading is the process of enhancing and adjusting the colors in a video or image to create a specific mood, tone, or emotional response. Many people might confuse color grading with color correction, but both are different.
Color correction is the process of adjusting the footage to achieve a natural and balanced look by correcting exposure, white balance contrast and color temperature. In simple terms, it makes your video look right with accurate skin tones and lighting.
While editing, it is recommended that color correction should be done first and then you should focus on color grading. This will help you get a better end result with your colors.
Let’s discuss the components covered under color grading and color correction first. Then we will discuss LUTs (Look Up Tables) and more techniques to make your video visually enhancing and captivating. Let’s get started!
1. Basic Color Correction
This is your foundational step before any stylistic grading begins. There are 3 main elements under basic color correction:
- White Balance: Correcting white balance ensures that whites appear neutral and that colors in the scene are not tinted. This is achieved by adjusting the temperature (warmth or coolness) and tint (green or magenta shift) to reflect how the human eye perceives white under various lighting conditions. Adjust the white balance as such to ensure that colors appear natural & true to life.
- Saturation: It adjusts the intensity or purity of colors. Too much saturation results in unnatural hues; too little creates a dull or flat appearance. Fine-tuning saturation maintains a natural yet vibrant visual tone.
- Adjust Exposure: Correct the brightness & contrast to ensure the footage is neither too dark nor too bright. This involves correcting the image’s brightness using tools like exposure sliders, contrast ratios, and gamma adjustments. The goal is to maintain detail in both highlights and shadows while keeping skin tones and critical elements properly lit.
2. Primary Color Correction
Primary correction involves global adjustments that affect the entire image uniformly. These adjustments typically include overall brightness, contrast, temperature, and color balance. They are made using tools like color wheels, lift/gamma/gain, or RGB curves.
This step ensures consistency in lighting and color across the entire scene or sequence, laying a balanced foundation for further enhancements.
3. Secondary Color Correction
This technique targets specific color ranges or image regions rather than affecting the whole frame. With qualifiers or power windows, editors can isolate specific tones (like a blue sky or skin tones) and adjust them independently.
This is ideal for scenarios like enhancing the blue of the ocean without altering skin tones or removing color casts from specific areas. Tools used for this include HSL qualifiers, masks, and keyframes for dynamic changes over time.
4. Using LUTs (Look-Up Tables)
LUTs are basically color preset files that transform input color values to output values, allowing you to instantly apply a stylized look. They are widely used to achieve cinematic tones, such as teal-and-orange or desaturated green looks common in blockbuster films.
LUTs can be technical (conversion LUTs) or creative (stylistic LUTs) and can be layered or fine-tuned for a custom result. It ensures that consistency is maintained across shots, especially in multi-camera or multi-location shoots.
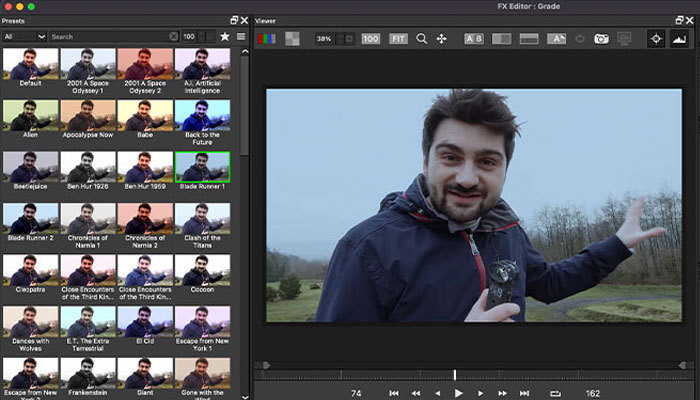
LUTs are easy to use, and they save time. There are different built-in packs available on editing softwares which you can use. You can also download certain packs from websites. Some popular sources include Freshluts, stock media platforms such as Shutterstock, and software-specific resources like ON1, which provides LUTs compatible with their photo editing software.
5. Color Wheels
Use color wheels to adjust color balance in different parts of the image. It provides intuitive control over the color balance in three tonal ranges: Shadows, Midtones, and Highlights.
By adjusting the wheel towards a specific color, you can tint that tonal range. For example, adding blue to shadows enhances a moody tone, while pushing midtones toward orange warms up skin tones. This granular control allows for precise tonal harmonization across your footage.
6. Curves Adjustment
Curves offer more refined control than sliders or wheels. The RGB Curve adjusts overall brightness and contrast by manipulating points along the tonal curve (shadows to highlights). Curves are essential for creating S-curves, which add contrast and cinematic punch.
You can also adjust individual red, green, and blue channels, enabling color tinting and correction at specific tonal levels. This technique provides fine control over the image’s tonal balance.
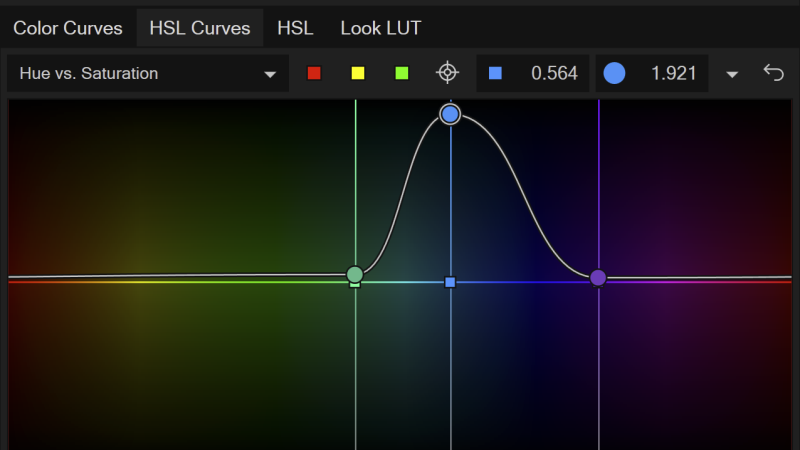
7. Hue or Saturation Curves
These curves allow for targeted color manipulation based on hue ranges. Adjust the hue, saturation & luminance of specific colors within the image for enhancing or correcting specific colors.
- Hue vs Hue: Change one color into another (e.g., changing a green shirt into blue).
- Saturation vs Hue: Increase or decrease the saturation of a specific color (e.g., more vibrant reds without affecting other colors).
- Hue vs Luminance: Control the brightness of specific hues. Handy for darkening overly bright greens or enhancing skin tones.
These controls give a high degree of creative freedom and precision in stylizing footage.
8. Split Toning
Split toning is used to apply two different colors to the highlights and shadows of an image. For example, adding warm orange tones to highlights and cool blues to shadows can create a cinematic or nostalgic mood.
This is especially effective in genres like indie films, travel vlogs, or music videos, where mood plays a central role in storytelling.
9. Vignetting
A vignette subtly darkens (or lightens) the edges of the frame. This is done to draw the viewer’s attention to the center or subject of the frame. It adds depth and focus, and it is often used subtly to enhance the overall composition without being obvious.
10. Film Emulation
It replicates the look of analog film stock, offering rich textures, soft contrast, and nuanced color shifts. This technique introduces subtle grain, halation, and analog-style color responses that mimic how traditional film reacts to light. It’s ideal for creators aiming for a nostalgic, vintage, cinematic, or narrative-heavy aesthetic.
Read More
The Basics of Color Grading in Video Production

How Can You Use VFX in Corporate Videos to Engage Viewers?

10 Video Thumbnail Design Hacks for High CTR
Conclusion
Color grading is where technical skill meets creative storytelling. By mastering these techniques, you can elevate your videos to a professional standard and evoke powerful emotional responses in your audience.
Always implement color correction first and the color grading later. This gives you a well-balanced base to work on.
Use the color grading tool wisely to set the mood and to give your content a cinematic edge, while keeping focus on the main message. When utilized properly, it can become an invisible force that helps your story connect, inspire, and stay memorable.
Thank you so much for reading and staying with us till now. Stay tuned for the next blog, where we will explore different LUT packs. See you later!