Green screen (aka chroma key) technology has become a cornerstone of modern content creation. It is being used across many industries. Educators are enhancing virtual lessons with immersive visuals. Brands are telling richer stories in their marketing campaigns. Creators are pushing the boundaries of expression in entirely new ways. It has become a canvas for limitless creativity.
Shooting with a green screen is both a technical and creative challenge. Getting great results depends on planning, lighting discipline, camera technique, and post craftsmanship.
But how we use it to spark imagination, evoke emotion, and bring visions to life is what matters the most. Mastering the use of green screen effectively is quickly becoming a must-have skill in the visual content space. By understanding how to blend lighting, composition and motion, we can create an environment for evoking a certain mood and guiding the viewer’s imagination without them realizing it.
The best part of using green screen is you don’t need a studio or a massive budget for experimenting. All it takes is a bit of curiosity, a spark of imagination, and the willingness to explore what’s possible when reality meets creativity. We have discussed some actionable tips, with examples to help your video production team achieve professional, trust‑worthy and clean results.
Table of Contents
- Why Green Screen Matters in Corporate Videos?
- Key Techniques & Best Practices for Corporate Green Screen Shoots
- Advanced Tips & Troubleshooting for Green Screen Shoots
- Corporate Video Examples Using Green Screen
- Best Practices for Corporate Video Strategy Using Green Screen
- Conclusion
- Frequently Asked Questions (FAQs) related to Green Screen
Why Green Screen Matters in Corporate Videos?
Before diving into technique, it helps to understand where green screen shines in a corporate context:
- Cost‑saving & logistical efficiency: Rather than traveling to multiple locations or shutting down operations for on‑site shoots, green screen lets you film in studio and composite backgrounds later.
- Consistency & brand control: Consistency is important for brand videos, CEO messages, or a series of training modules to maintain their unique brand identity. Green screen helps ensure a consistent overall look by using the same kind of lighting to maintain similar aesthetics.
- Flexibility for storytelling: You can create virtual sets, animate data overlays, insert branded visuals behind speakers, or shift environments without re‑shooting.
Key Techniques & Best Practices for Corporate Green Screen Shoots
Here are vital technical and creative practices, with corporate video examples, for using green screen well.
1. Pre-Production: Planning and Setup
Before hitting the record button, good planning can save hours or days.
Choose the Right Green Screen Material & Size
- Use wrinkle‑resistant fabric or a smooth painted wall. Any texture, folds, stains or seams will cause trouble when keying.
- Make the screen larger than the expected frame. If your subject moves, you don’t want them exiting the green area or revealing edges.
- In small setups, collapsible “pop‑up” green screens can help, but they must still be smooth and tensioned.
Plan Your Final Composite Early
- Make sure to define the final background(s) early, according to the needs of the video. (virtual office, branded backdrop, product visuals, etc.). Determine your lighting strategy & props to match the composite environment.
- Study the lighting and perspective of the background image or video you will composite into. This lets you match lighting direction, contrast, and color temperature on set. Lighting your subject to reflect the final scene is crucial.
- If the background has dramatic shadows or directional light (e.g. sunlight coming from left), replicate that with your subject lighting.
- Track markers: For shots involving camera movement, place tracking markers (e.g. small dots) on the green screen in areas your subject won’t block. These help with motion tracking in post-production.
2. Camera Settings: Shutter, Aperture, ISO
Getting the “right” camera settings help in creating footage that is easier to key and more visually pleasing.
Shutter Speed: Minimize Motion Blur
A faster shutter reduces motion blur, making edges crisper and easier for the keyer to distinguish. Usually, it is recommended to double the frame rate (e.g. for 24 fps, use ~1/48 or 1/50). However, too high a shutter can underexpose your subject or make motion feel staccato. It’s all about balance.
Aperture: Control Depth of Field
Using a lower f‑stop (wider aperture) gives a shallower depth of field, which can slightly blur the green screen, helping mask minor imperfections. On the flip side, too shallow depth can lead to parts of the subject (e.g. hands, hair) going out of focus. Choose a balance (e.g. f/4, f/5.6) so your subject is fully sharp, while still softening the background.
ISO: Keep Noise Minimal
Higher ISO introduces sensor noise or “grain,” which complicates chroma keying (noise changes pixel colors). Keep your ISO as low (or at native ISO) as possible. If your subject is too dark, use more light but don’t push ISO too far.
White Balance / Color Profile
Fix your white balance manually (do not use auto) so that green hue remains consistent across clips. Inconsistent green tones confuse the keyer. If your camera allows, shoot in a flatter (log) or neutral color profile. This preserves more detail and flexibility in post-production.
3. Subject Placement & Wardrobe
How your subject is placed relative to the green screen and what they wear can make or break the composite.
Maintain Adequate Distance
- The further your subject is from the green screen, the less spill (green light reflecting onto them) and unwanted shadows will be. Common recommendation is 3–6 feet (≈1–2 m) or more. You can also keep at least ~6 ft in tight studios to reduce spill and shadows.
- Keeping the maximum distance helps in matching lighting and avoiding spill.
Wardrobe & Props
- Avoid greens, teals, or colors close to the green screen hue otherwise, parts will disappear.
- Avoid shine or reflective materials (glossy fabrics, metallics, shiny jewelry, sequins) because they reflect the green screen back, causing artifacts.
- Don’t wear clothes with extremely busy patterns or small details that create jagged edges.
- For hair or fringes, use anti‑flyaway spray to control stray hairs (which otherwise cause keying issues). You can also use careful lighting and plan for edge softening in post-production.
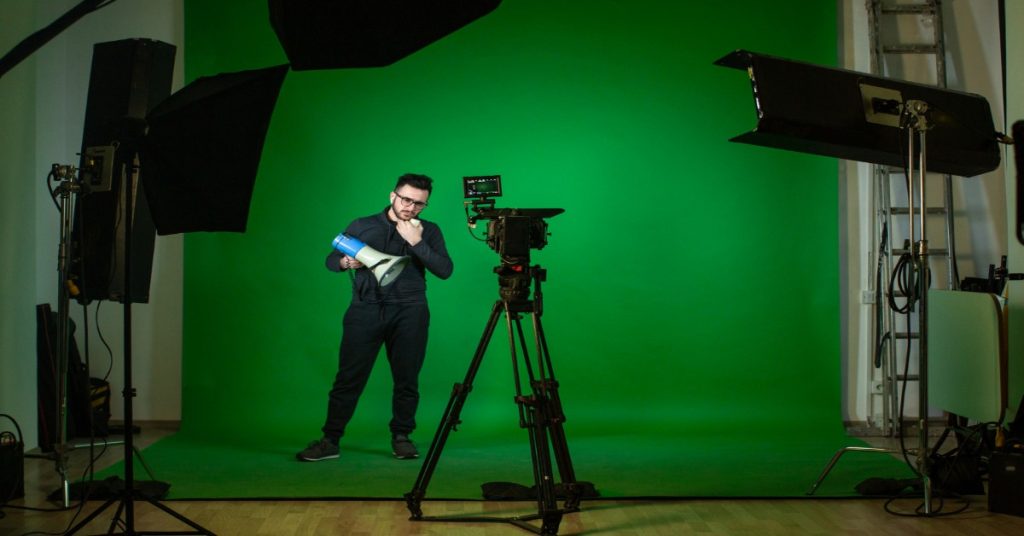
4. Lighting Techniques & Best Practices
Lighting is the most critical factor in green screen success. A poor lighting can ruin a perfect camera setup.
Light the Green Screen Separately
- Treat lighting the screen and lighting the subject as independent tasks. The screen should be lit flat and uniformly, with no shadows or bright spots.
- Use two (or more) lights at ~45° angles pointing at the green screen, avoiding overlapping that causes hot spots.
- Use diffusion (softboxes, silk, diffusing panels) to soften light across the screen and avoid harsh edges.
- A light meter or camera histogram / zebras can help detect uneven exposure.
- For large setups, overhead light or fill lights may be required to maintain uniform coverage.
Light the Subject (Three‑Point Lighting + Backlight)
- Use key light, fill light, and backlight/rim light to model your subject. This is standard practice in portrait lighting, and it helps the subject look natural in the final composite.
- The backlight (rim light or “hair light”) helps separate the subject from the background, counteracting any green spill.
- Sometimes “minus green” gels are used on subject-facing lights to reduce green spill.
- Match your lighting direction, key-to-fill ratio, and color temperature to your intended composite background.
- Avoid lighting extremes (too bright vs too dark). The goal is balanced and natural illumination.
Watch for Hotspots, Shadows & Spill
- Even with care, you may get brighter patches (“hot spots”) or dark zones. Adjust, move lights, or use diffusion to compensate.
- Green spill (reflected green light on the subject) is one of the most common problems. Maintain spacing, use backlight, and filter lights to minimize it.
- Use negative fill (black cards or flags) to reduce reflections bouncing back onto the subject.
- Some high-end setups use LED walls instead of cloth screens; they inherently reduce spill and lighting variation.
Test Early & Often
- Before recording, take test footage, key it, and look for trouble areas. Better to catch issues early.
- Use tools like zebras, histogram, false color to check evenness of the green.
- Some filmmakers recommend lighting only the screen first (everything else dark), then lighting the subject so you see how flat the screen is by itself. Many editors work this way.
5. Shooting Workflow & Tips
The way you shoot your footage, and your on-set habits, directly affects how easy (or hard) post-production gets.
Frame and Coverage
- Make sure your green screen covers the entire area seen by the camera, including headroom and travel area.
- For full-body or action shots, consider extending the green to the floor or using a curved cy‑wrap to avoid harsh floor edges.
- If your subject moves or gestures, allow “breathing room” so they don’t clip the green zone.
Camera Movements & Focus
- If you plan camera moves, tilt, pan or zoom, ensure your green screen is large enough and uniformly lit across the area covered by motion.
- Lock focus (manual) if possible. Don’t rely on autofocus, which may drift.
- For shifting subject distances, double-check how depth of field behaves (you don’t want to be out of focus against the green).
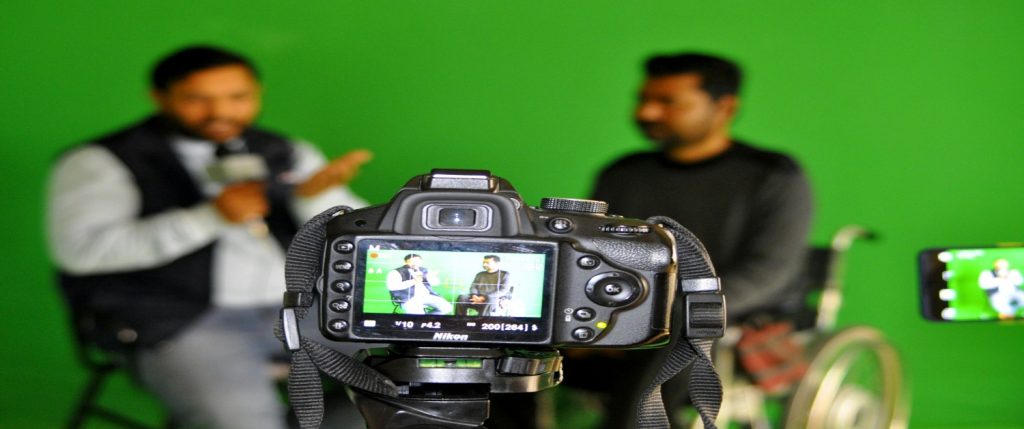
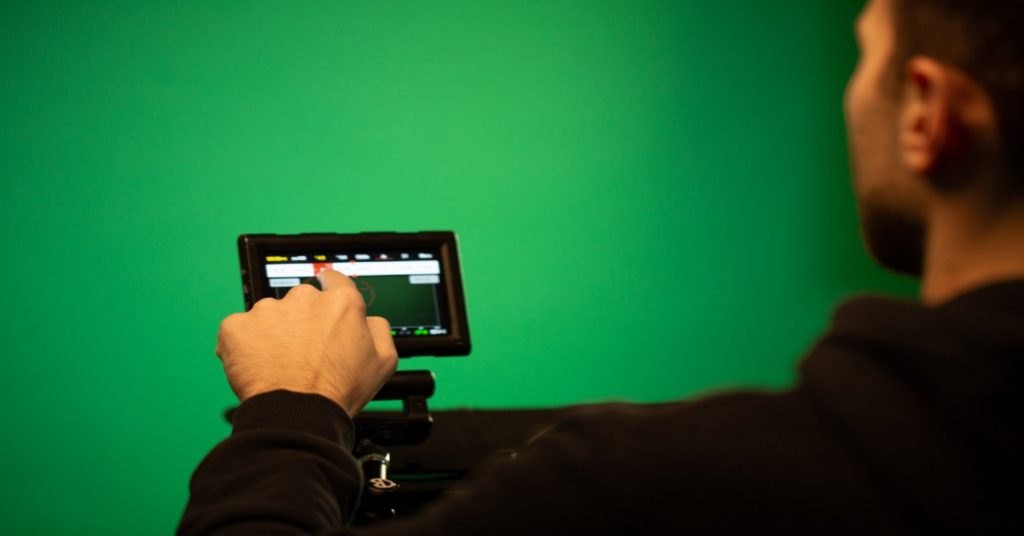
Monitor & Check in Real Time
- If you can, use a preview plug-in or live chroma-key test on set (some cameras or external recorders allow this) to see if the frame keys are clean.
- Always inspect edges (hair, fingers), and notice if any green bleed appears.
- Remove clutter that might cast unintended shadows or reflect green light.
Workflow Tips from Experts
- Some VFX editors recommend multiple passes of chroma keying (multiple layers or thresholds) to refine tough edges.
- Record ambient “plate” shots of just the green screen (no subject) for help in post matte operations.
- Label your takes and ensure metadata (lighting notes, camera settings) are recorded. This helps compositors later.
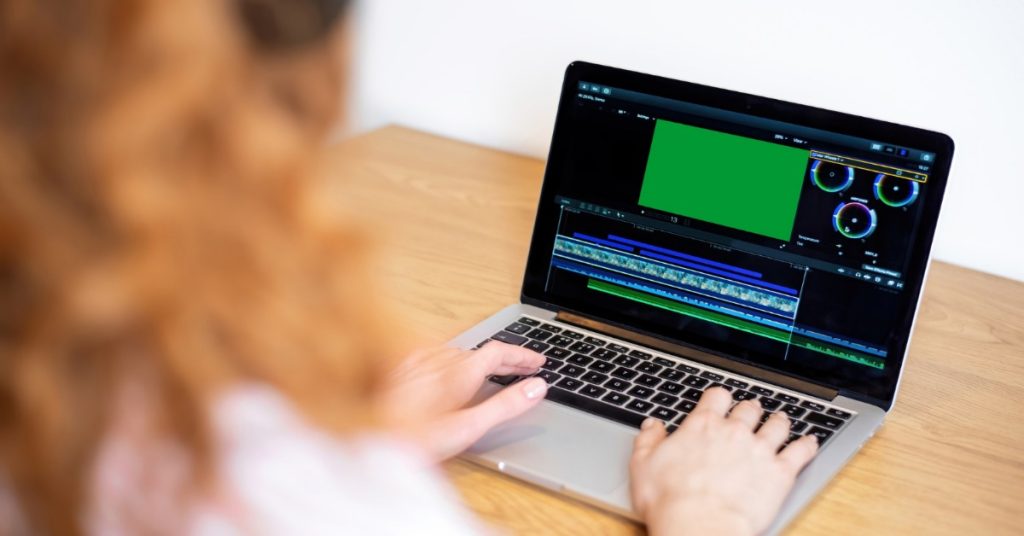
6. Post-Production: Chroma Keying & Cleanup
The shoot is only half the battle; the other half is post-production. Good footage makes your life easier, but you still need to do fine cleanup.
Choose a Strong Keying Tool
- In Adobe Premiere Pro, “Ultra Key” is a powerful option. You select the green and tweak Matte Generation, Matte Cleanup, Spill Suppression, etc.
- In DaVinci Resolve, the Fusion keyer offers multiple refinements (edge softness, spill removal).
- In After Effects, built-in keyers (Keylight, Advanced Spill Suppressor) are industry standard.
Edge Refinement & Spill Suppression
- Soften or choke edges slightly to avoid harsh outlines.
- Use color correction on the green channel to remove greenish fringing.
- Use secondary keying or garbage mattes to isolate tricky areas (e.g. hands, hair).
- Sometimes combine luma keying (brightness-based key) in fringe areas to assist the chroma key.
- In extreme cases, rotoscoping (manual masking) may be needed, but good shooting should minimize this.
Matching to the Background
- Adjust lighting, contrast and color grade your subject so they “live” in the background.
- Add shadows, reflections, or color casts to anchor the subject in the scene. For example, if the background is outdoors with sunlight coming from left, add a subtle shadow on the subject’s right side.
- Use blur, depth-of-field, or grain matching to match the texture of your background.
- In multi-shot sequences, maintain consistency: same key settings, same grading, same spill treatments.
Advanced Tips & Troubleshooting for Green Screen Shoots
Even with best practices, you may face tricky issues. Here are some pro tips and fixes.
Fine Hair & Semi-Transparent Objects
- These are among the toughest areas to key. Sometimes you’ll need two keyers (a coarse key and a fine key) and blend them.
- For wispy hair, use soft matte techniques and careful color correction of the fringe.
Changing Light or Shadows
If lighting unintentionally changes (e.g. daylight leaking in), the green hue will shift over time, making a static key impossible.
- Use image-based keyers which can handle shifts.
- Better: block all ambient light and rely only on controlled lights.
- During pre‑production, examine background reference, match lighting direction, color temperature and contrast. In post-production, adjust color grade to harmonize subject and background
Limited Space or Low Budget
- When room is small, push subject as far from the green as possible, then use diffusion and careful lighting to reduce spill.
- Use smaller, soft light sources and control spill carefully.
- Sometimes shooting on blue screen works better if your subject wardrobe tends toward green. (Note: blue screens tend to give less luminance but less spill.)
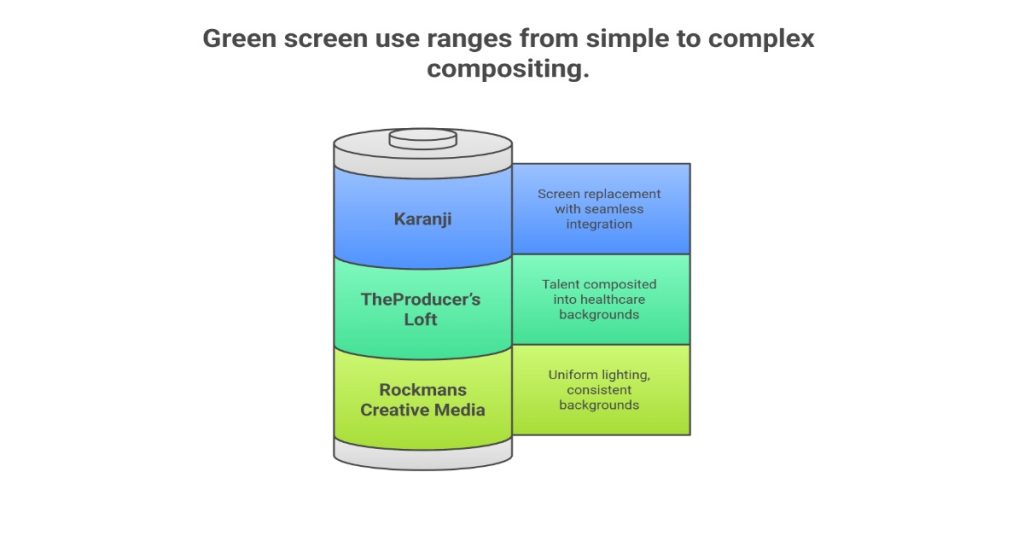
Corporate Video Examples Using Green Screen
Here are several concrete case studies and examples of corporate video work using green screen, to illustrate how companies have made this approach work well.
1. Healthcare / Marketing Video for AT&T—TheProducer’s Loft
Due to limited access to real hospital/clinical environments, talent was shot against green screen and digitally composited into healthcare‑appropriate backgrounds. This preserved realism and avoided the costs or logistic complexity of location shoots.
2. Positive Ageing Presentation by Rockmans Creative Media
Dozens of interview‑style corporate videos were produced in one shoot day using green screen, allowing uniform lighting and consistent backgrounds, which would have been difficult to arrange across many physical locations.
3. Karanji Case Study
A phone in a corporate storytelling video had its screen replaced using green screen and tracking tools (Mocha AE etc.). The aim was to show a different video on the phone (murder‑scene footage) integrated seamlessly, preserving motion and lighting.
Best Practices for Corporate Video Strategy Using Green Screen
To ensure green screen content consistently delivers value in the corporate space, here are some strategic practices:
1. Story first, effects second
Use green screen to support the message and not distract from it. Corporate videos are about brand credibility, clarity of messaging, training efficacy, etc. Any visual element should reinforce that.
2. Branding consistency
Maintain brand colors, visual style, font overlays, background “look” consistent. If you’re replacing background with branded assets (e.g. virtual office), ensure those designs align with your corporate identity.
3. Scalable production pipelines
When creating multiple videos (e.g. a series of training or testimonial videos), standardize cameras, lighting, settings, and post workflow to make batch work faster and consistent.
4. Budget and time forecasting
Include time for pre‑lighting, test keying, post‑cleanup in your estimates. Corporate clients often don’t realize how much cleanup good keying takes; over‑promising can lead to long post periods.
5. Quality control & client review points
Build in formal review stages: after shoot, after rough keying, after color grading. Let the client see how composite works so that early corrections can be made.
Conclusion
For corporate video production, if green screen is used well, it enables control, consistency, brand alignment, and cost efficiency. Using green screens effectively can help deliver high‑quality visuals, control costs, and maintain consistency across content.
With the right planning, camera technique, lighting discipline, wardrobe, and post‑production finesse, green screen can help your clients look sharp, credible, and professional, even when circumstances (location, budget, schedule) are constrained.
Read More
Mastering Smooth Shots with Gimbals: Elevate Your Video Production

Tools for Remote Video Production to Collaborate in 2025

Is Rise in AI Adoption a Threat to Traditional Video Production?
Frequently Asked Questions (FAQs) related to Green Screen
Q1- What are the benefits of using a green screen?
Using a green screen allows for seamless background replacement in post-production, giving you creative control over the environment without expensive sets or travel. It’s especially valuable in corporate videos for maintaining brand consistency, enhancing storytelling, and simplifying reshoots or updates.
Q2- What are the disadvantages of green screens?
Green screens require careful lighting, wardrobe choices, and post-production work. Poor lighting or spill can lead to uneven keying, while subjects wearing green can blend into the background. It also adds complexity to editing if not planned properly during shooting.
Q3- What colors look best on a green screen?
Avoid wearing green or any shade close to it. Neutral tones like gray, navy blue, beige, or pastels (as long as they don’t reflect green) work best. Bright white or black can sometimes cause issues with lighting and contrast, so use with care.
Q4- Does the color of a green screen matter?
Yes, it does. Green is used because it’s distinct from most skin tones and clothing. However, blue screens are sometimes used if the subject is wearing green or if the scene has low light (blue has less spill). The choice depends on the subject and the scene set-up.
Q5- What all do you need for a green screen?
A complete setup typically includes:
- A non-reflective green backdrop (fabric, paint, or pop-up screen)
- Even lighting for the backdrop and separate lighting for the subject
- A good camera with manual settings
- Tripod for camera stability
- Chroma key software for post-production (e.g., Adobe Premiere, Final Cut Pro)
Q6- What is the best aperture for a green screen?
A mid-range aperture like f/4 to f/5.6 is ideal. It keeps the subject in sharp focus while slightly blurring the background to reduce visible wrinkles or shadows on the green screen. Avoid very wide apertures (like f/1.8) which can blur too much.
Q7- What ISO for green screen?
Keep ISO as low as possible, ISO 100–400 to avoid digital noise. Noise can interfere with clean chroma keying, especially in the background. Good lighting helps maintain low ISO without underexposing your footage.
Q8- What is the best frame rate for chroma key?
For most corporate videos, 24fps or 30fps works well. Choose 24fps for a cinematic feel or 30fps for a crisp or broadcast-ready look. Ensure consistent frame rate throughout production to avoid keying issues during editing.